| Edition | Deployment Type |
|---|
| Enterprise | Self-Managed, Hybrid, Cloud |
Supported Operating Systems
| Operating System | Version |
|---|
| Ubuntu | 20.04 (focal), 22.04 (jammy), 24.04 (noble) |
| Red Hat Enterprise Linux | 7.9, 8.9, 9.3 |
| CentOS Stream | Stream 9, Stream 10 |
| Debian | 11 (Bullseye), 12 (Bookworm) |
| Amazon Linux | 2023.7 |
Prerequisites
Install Tyk on Red Hat (RHEL / CentOS)
Select the preferred way of installing Tyk by selecting Shell or Ansible tab for instructions.
There are 4 components which needs to be installed. Each can be installed via shell or ansible
Install Database
Using Shell
Supported Distributions
| Distribution | Version | Supported |
|---|
| CentOS | 7 | ✅ |
| RHEL | 9 | ✅ |
| RHEL | 9 | ✅ |
| RHEL | 8 | ✅ |
| RHEL | 7 | ✅ |
sudo -u postgres createuser --interactive
sudo -u postgres createdb tyk
ALTER ROLE tyk with PASSWORD '123456';
sudo -u tyk createdb tyk_analytics
# Optionally ensure that MongoDB will start following a system reboot
sudo systemctl enable mongod
# start MongoDB server
sudo systemctl start mongod
Using Ansible
You can install Tyk on RHEL or CentOS using our YUM repositories. Follow the guides and tutorials in this section to have Tyk up and running in no time.
The order is to install Tyk Dashboard, then Tyk Pump and then Tyk Gateway for a full stack.
-
Dashboard
-
Pump
-
Gateway
For a production environment, we recommend that the Tyk Gateway, Tyk Dashboard and Tyk Pump are installed on separate machines. If installing multiple Tyk Gateways, you should install each on a separate machine. See Planning for Production for more details.
Supported Distributions
| Distribution | Version | Supported |
|---|
| CentOS | 7 | ✅ |
| RHEL | 9 | ✅ |
| RHEL | 8 | ✅ |
| RHEL | 7 | ✅ |
-
clone the tyk-ansible repositry
$ git clone https://github.com/TykTechnologies/tyk-ansible
-
cd into the directory
-
Run initialisation script to initialise environment
-
Modify
hosts.yml file to update ssh variables to your server(s). You can learn more about the hosts file here
-
Run ansible-playbook to install the following:
- Redis
- MongoDB or PostgreSQL
- Tyk Dashboard
- Tyk Gateway
- Tyk Pump
$ ansible-playbook playbook.yaml -t tyk-pro -t redis -t `mongodb` or `pgsql`
-t redis or -t mongodb or -t pgsql However Redis and MongoDB or PostgreSQL are a requirement and need to be installed for the Tyk Pro installation to run.
Variables
| Variable | Default | Comments |
|---|
| secrets.APISecret | 352d20ee67be67f6340b4c0605b044b7 | API secret |
| secrets.AdminSecret | 12345 | Admin secret |
| redis.host | | Redis server host if different than the hosts url |
| redis.port | 6379 | Redis server listening port |
| redis.pass | | Redis server password |
| redis.enableCluster | false | Enable if redis is running in cluster mode |
| redis.storage.database | 0 | Redis server database |
| redis.tls | false | Enable if redis connection is secured with SSL |
| mongo.host | | MongoDB server host if different than the hosts url |
| mongo.port | 27017 | MongoDB server listening port |
| mongo.tls | false | Enable if mongo connection is secured with SSL |
| pgsql.host | | PGSQL server host if different than the hosts url |
| pgsql.port | 5432 | PGSQL server listening port |
| pgsql.tls | false | Enable if pgsql connection is secured with SSL |
| dash.license | | Dashboard license |
| dash.service.host | | Dashboard server host if different than the hosts url |
| dash.service.port | 3000 | Dashboard server listening port |
| dash.service.proto | http | Dashboard server protocol |
| dash.service.tls | false | Set to true to enable SSL connections |
| gateway.service.host | | Gateway server host if different than the hosts url |
| gateway.service.port | 8080 | Gateway server listening port |
| gateway.service.proto | http | Gateway server protocol |
| gateway.service.tls | false | Set to true to enable SSL connections |
| gateway.sharding.enabled | false | Set to true to enable filtering (sharding) of APIs |
| gateway.sharding.tags | | The tags to use when filtering (sharding) Tyk Gateway nodes. Tags are processed as OR operations. If you include a non-filter tag (e.g. an identifier such as node-id-1, this will become available to your Dashboard analytics) |
| gateway.rpc.connString | | Use this setting to add the URL for your MDCB or load balancer host |
| gateway.rpc.useSSL | true | Set this option to true to use an SSL RPC connection |
| gateway.rpc.sslInsecureSkipVerify | true | Set this option to true to allow the certificate validation (certificate chain and hostname) to be skipped. This can be useful if you use a self-signed certificate |
| gateway.rpc.rpcKey | | Your organization ID to connect to the MDCB installation |
| gateway.rpc.apiKey | | This the API key of a user used to authenticate and authorize the Gateway’s access through MDCB. The user should be a standard Dashboard user with minimal privileges so as to reduce any risk if the user is compromised. The suggested security settings are read for Real-time notifications and the remaining options set to deny |
| gateway.rpc.groupId | | This is the zone that this instance inhabits, e.g. the cluster/data-center the Gateway lives in. The group ID must be the same across all the Gateways of a data-center/cluster which are also sharing the same Redis instance. This ID should also be unique per cluster (otherwise another Gateway cluster can pick up your keyspace events and your cluster will get zero updates). |
| Variable | Default | Comments |
|---|
| redis_bind_interface | 0.0.0.0 | Binding address of Redis |
| Variable | Default | Comments |
|---|
| bind_ip | 0.0.0.0 | Binding address of MongoDB |
| mongodb_version | 4.4 | MongoDB version |
| Variable | Default | Comments |
|---|
| postgresql_databases[] | [] | Array of DBs to be created |
| postgresql_databases[].name | tyk_analytics | Database name |
| postgresql_users[] | [] | Array of users to be created |
postgresql_users[0].name | default | User name |
postgresql_users[0].password | topsecretpassword | User password |
| postgresql_global_config_options[] | [] | Postgres service config options |
postgresql_global_config_options[1].option | listen_addresses | Listen address binding for the service |
postgresql_global_config_options[1].value | * | Default value to listen to all addresses |
| postgresql_hba_entries[] | [] | Host based authenticaiton list |
postgresql_hba_entries[4].type | host | Entry type |
postgresql_hba_entries[4].database | tyk_analytics | Which database this entry will give access to |
postgresql_hba_entries[4].user | default | What users this gain access from this entry |
postgresql_hba_entries[4].address | 0.0.0.0/0 | What addresses this gain access from this entry |
postgresql_hba_entries[4].auth_method | md5 | What authentication method to to use for the users |
Install Dashboard
Using Shell
Tyk has its own signed RPMs in a YUM repository hosted by the kind folks at packagecloud.io, which makes it easy, safe and secure to install a trusted distribution of the Tyk Gateway stack.
This configuration should also work (with some tweaks) for CentOS.
Prerequisites
- Ensure port
3000 is open: This is used by the Dashboard to provide the GUI and the Classic Developer Portal.
- Follow the steps provided in this link Getting started on Red Hat (RHEL / CentOS) to install and configure Tyk dependencies.
-
Set up YUM Repositories
First, install two package management utilities
yum-utils and a file downloading tool wget:
sudo yum install yum-utils wget
-
Configure and Install the Tyk Dashboard
Create a file named
/etc/yum.repos.d/tyk_tyk-dashboard.repo that contains the repository configuration settings for YUM repositories tyk_tyk-dashboard and tyk_tyk-dashboard-source used to download packages from the specified URLs, including GPG key verification and SSL settings, on a Linux system.
Make sure to replace el and 8 in the config below with your Linux distribution and version:
[tyk_tyk-dashboard]
name=tyk_tyk-dashboard
baseurl=https://packagecloud.io/tyk/tyk-dashboard/el/8/$basearch
repo_gpgcheck=1
gpgcheck=0
enabled=1
gpgkey=https://packagecloud.io/tyk/tyk-dashboard/gpgkey
sslverify=1
sslcacert=/etc/pki/tls/certs/ca-bundle.crt
metadata_expire=300

[tyk_tyk-dashboard-source]
name=tyk_tyk-dashboard-source
baseurl=https://packagecloud.io/tyk/tyk-dashboard/el/8/SRPMS
repo_gpgcheck=1
gpgcheck=0
enabled=1
gpgkey=https://packagecloud.io/tyk/tyk-dashboard/gpgkey
sslverify=1
sslcacert=/etc/pki/tls/certs/ca-bundle.crt
metadata_expire=300
tyk_tyk-dashboard repository while disabling all other repositories --disablerepo='*' --enablerepo='tyk_tyk-dashboard', and confirm all prompts -y.
sudo yum -q makecache -y --disablerepo='*' --enablerepo='tyk_tyk-dashboard'
sudo yum install -y tyk-dashboard
-
Confirm Redis and MongoDB or PostgreSQL are running
Start Redis since it is always required by the Dashboard.
Then start either MongoDB or PostgreSQL depending on which one you are using.
sudo systemctl start mongod
sudo systemctl start postgresql-13
-
Configure Tyk Dashboard
We can set the Dashboard up with a similar setup command, the script below will get the Dashboard set up for the local instance.
Make sure to use the actual DNS hostname or the public IP of your instance as the last parameter.
sudo /opt/tyk-dashboard/install/setup.sh --listenport=3000 --redishost=<Redis Hostname> --redisport=6379 --mongo=mongodb://<Mongo IP Address>:<Mongo Port>/tyk_analytics --tyk_api_hostname=$HOSTNAME --tyk_node_hostname=http://localhost --tyk_node_port=8080 --portal_root=/portal --domain="XXX.XXX.XXX.XXX"
<Redis Hostname>, <Mongo IP Address> and <Mongo Port> with your own values to run this script.sudo /opt/tyk-dashboard/install/setup.sh --listenport=3000 --redishost=<Redis Hostname> --redisport=6379 --storage=postgres --connection_string=postgresql://<User>:<Password>@<PostgreSQL Hostname>:<PostgreSQL Port>/<PostgreSQL DB> --tyk_api_hostname=$HOSTNAME --tyk_node_hostname=http://localhost --tyk_node_port=8080 --portal_root=/portal --domain="XXX.XXX.XXX.XXX"
<Redis Hostname>,<PostgreSQL Hostname>,<PostgreSQL Port>, <PostgreSQL User>, <PostgreSQL Password> and <PostgreSQL DB> with your own values to run the script.
--listenport=3000: Tyk Dashboard (and Portal) to listen on port 3000.--redishost=<hostname>: Tyk Dashboard should use the local Redis instance.--redisport=6379: The Tyk Dashboard should use the default port.--domain="XXX.XXX.XXX.XXX": Bind the Dashboard to the IP or DNS hostname of this instance (required).--mongo=mongodb://<Mongo IP Address>:<Mongo Port>/tyk_analytics: Use the local MongoDB (should always be the same as the Gateway).--storage=postgres: In case, your preferred storage Database is PostgreSQL, use storage type “postgres” and specify connection string.--connection_string=postgresql://<User>:<Password>@<PostgreSQL Host Name>:<PostgreSQL Port>/<PostgreSQL DB>: Use the PostgreSQL instance provided in the connection string (should always be the same as the gateway).--tyk_api_hostname=$HOSTNAME: The Tyk Dashboard has no idea what hostname has been given to Tyk, so we need to tell it, in this instance we are just using the local HOSTNAME env variable, but you could set this to the public-hostname/IP of the instance.--tyk_node_hostname=http://localhost: The Tyk Dashboard needs to see a Tyk node in order to create new tokens, so we need to tell it where we can find one, in this case, use the one installed locally.--tyk_node_port=8080: Tell the Dashboard that the Tyk node it should communicate with is on port 8080.--portal_root=/portal: We want the Portal to be shown on /portal of whichever domain we set for the Portal.
-
Start Tyk Dashboard
sudo service tyk-dashboard start
To check the logs from the deployment run:sudo journalctl -u tyk-dashboard
When using PostgreSQL you may receive the error: "failed SASL auth (FATAL: password authentication failed for user...)", follow these steps to address the issue:
- Open the terminal or command prompt on your PostgreSQL server.
- Navigate to the location of the
pg_hba.conf file. This file is typically located at /var/lib/pgsql/13/data/pg_hba.conf.
- Open the
pg_hba.conf file using a text manipulation tool.
- In the
pg_hba.conf file, locate the entry corresponding to the user encountering the authentication error. This entry might resemble the following:
host all all <IP_address>/<netmask> scram-sha-256
- In the entry, find the METHOD column. It currently has the value scram-sha-256.
- Replace scram-sha-256 with md5, so the modified entry looks like this:
host all all <IP_address>/<netmask> md5
- Save the changes you made to the
pg_hba.conf file.
- Restart the PostgreSQL service to apply the modifications:
sudo systemctl restart postgresql-13
-
Enter Dashboard license
Add your license in
/var/opt/tyk-dashboard/tyk_analytics.conf in the license field.
If all is going well, you will be taken to a Dashboard setup screen - we’ll get to that soon.
-
Restart the Dashboard process
Because we’ve just entered a license via the UI, we need to make sure that these changes get picked up, so to make sure things run smoothly, we restart the Dashboard process (you only need to do this once) and (if you have it installed) then start the gateway:
sudo service tyk-dashboard restart
-
Go to the Tyk Dashboard URL
Go to the following URL to access to the Tyk Dashboard:
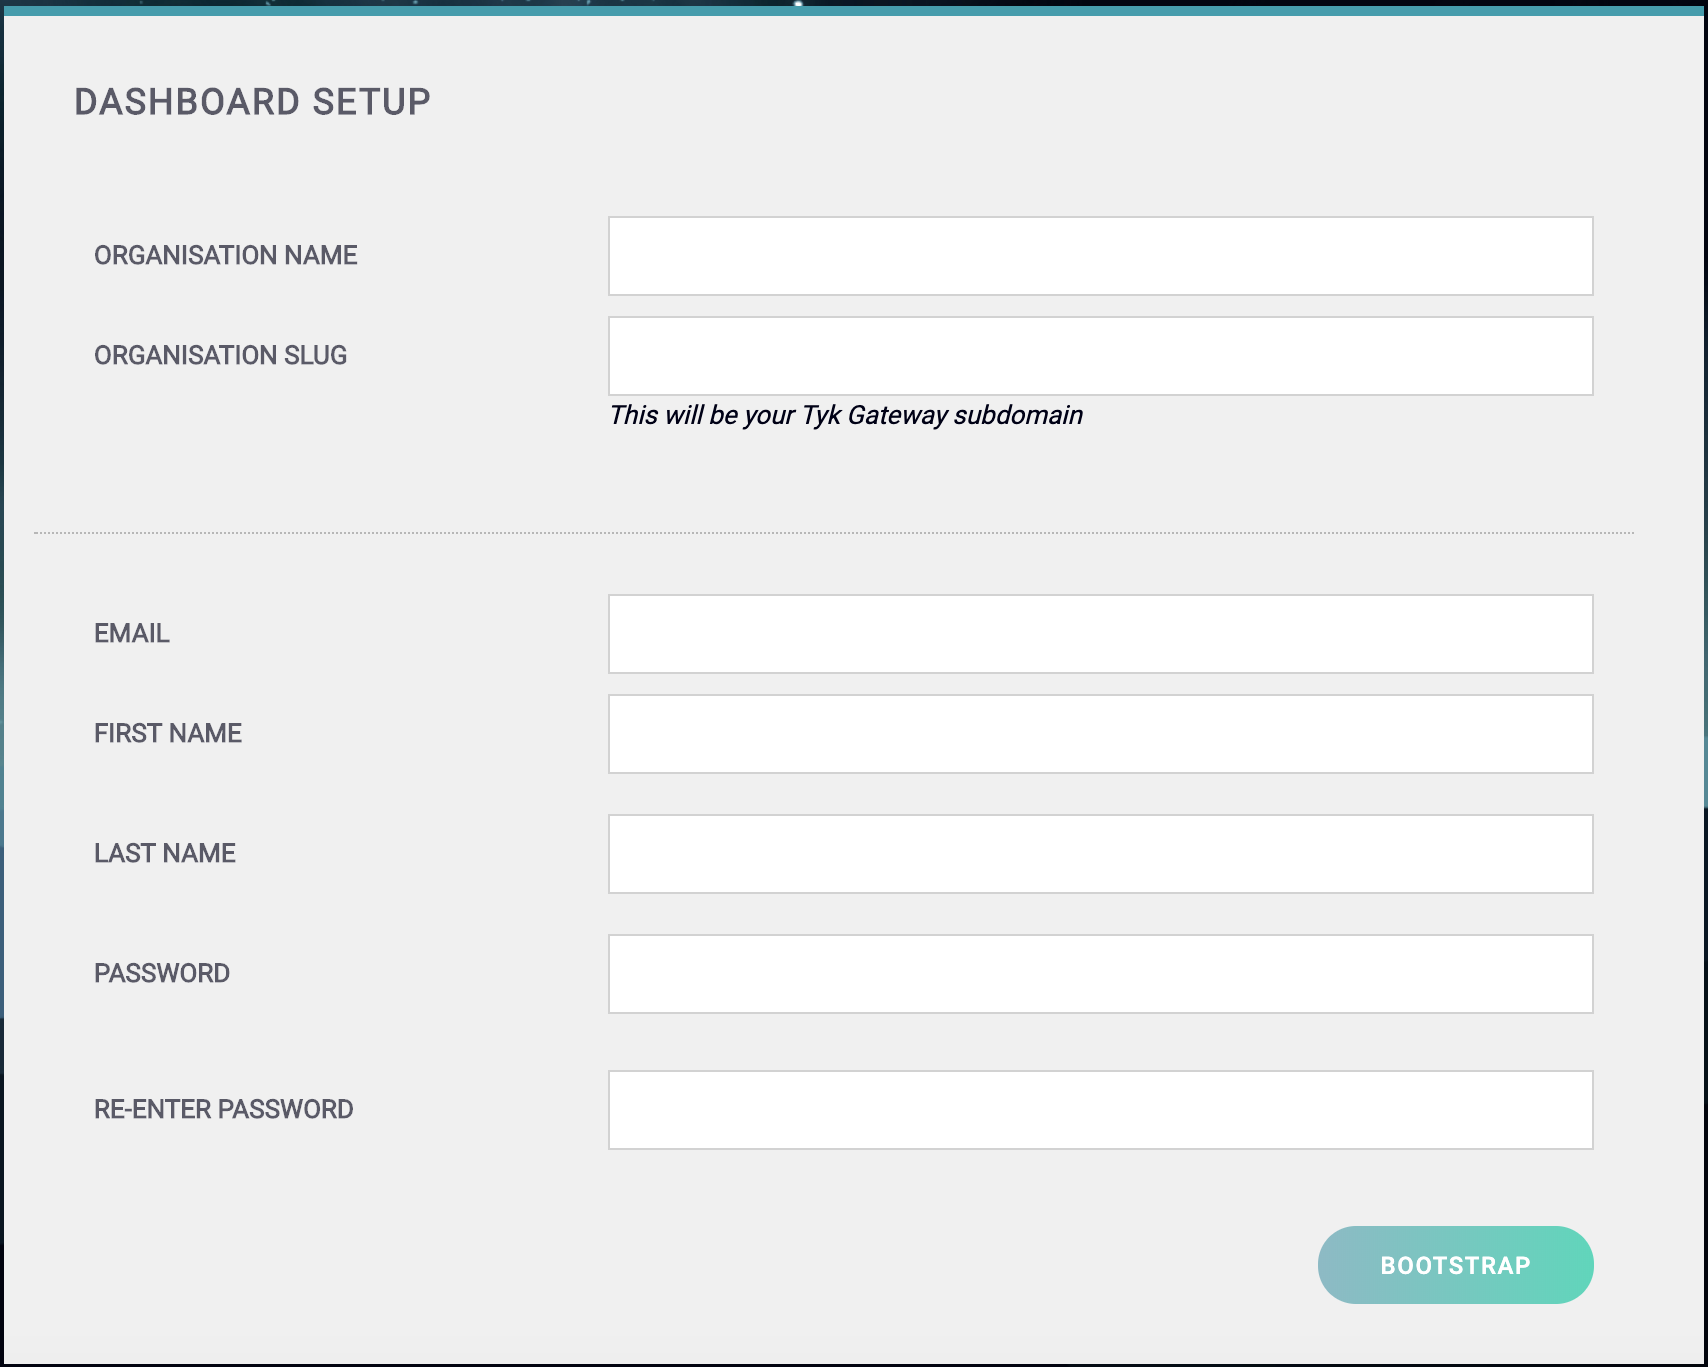
You should get to the Tyk Dashboard Setup screen:
-
Create your Organization and Default User
You need to enter the following:
-
Your Organization Name
-
Your Organization Slug
-
Your User Email Address
-
Your User First and Last Name
-
A Password for your User
-
Re-enter your user Password
For a password, we recommend a combination of alphanumeric characters, with both upper and lower case letters.
-
Login to the Dashboard
You can now log in to the Tyk Dashboard from
127.0.0.1:3000, using the username and password created in the Dashboard Setup screen.
Configure your Developer Portal
To set up your Developer Portal follow our Self-Managed tutorial on publishing an API to the Portal Catalog.
Using Ansible
Getting Started
- clone the tyk-ansible repository
$ git clone https://github.com/TykTechnologies/tyk-ansible
cd into the directory
- Run initialisation script to initialise environment
-
Modify
hosts.yml file to update ssh variables to your server(s). You can learn more about the hosts file here
-
Run ansible-playbook to install
tyk-dashboard
$ ansible-playbook playbook.yaml -t tyk-dashboard
| Distribution | Version | Supported |
|---|
| Amazon Linux | 2 | ✅ |
| CentOS | 8 | ✅ |
| CentOS | 7 | ✅ |
| RHEL | 9 | ✅ |
| RHEL | 8 | ✅ |
| RHEL | 7 | ✅ |
| Variable | Default | Comments |
|---|
| secrets.APISecret | 352d20ee67be67f6340b4c0605b044b7 | API secret |
| secrets.AdminSecret | 12345 | Admin secret |
| dash.license | | Dashboard license |
| dash.service.host | | Dashboard server host if different than the hosts url |
| dash.service.port | 3000 | Dashboard server listening port |
| dash.service.proto | http | Dashboard server protocol |
| dash.service.tls | false | Set to true to enable SSL connections |
Install Pump
Using Shell
Tyk has it’s own signed RPMs in a YUM repository hosted by the kind folks at packagecloud.io, which makes it easy, safe and secure to install a trusted distribution of the Tyk Gateway stack.
This tutorial will run on an Amazon AWS Red Hat Enterprise Linux 7.1 instance. We will install Tyk Pump with all dependencies stored locally.
We’re installing on a t2.micro because this is a tutorial, you’ll need more RAM and more cores for better performance.
This configuration should also work (with some tweaks) for CentOS.
Prerequisites
We are assuming that Redis and either MongoDB or SQL are installed (these are installed as part of the Tyk Gateway and Dashboard installation guides)
Step 1: Set up YUM Repositories
First, we need to install some software that allows us to use signed packages:
sudo yum install pygpgme yum-utils wget
/etc/yum.repos.d/tyk_tyk-pump.repo that contains the repository configuration below:
Make sure to replace el and 7 in the config below with your Linux distribution and version:
[tyk_tyk-pump]
name=tyk_tyk-pump
baseurl=https://packagecloud.io/tyk/tyk-pump/el/7/$basearch
repo_gpgcheck=1
gpgcheck=1
enabled=1
gpgkey=https://keyserver.tyk.io/tyk.io.rpm.signing.key.2020
       https://packagecloud.io/tyk/tyk-pump/gpgkey
sslverify=1
sslcacert=/etc/pki/tls/certs/ca-bundle.crt
metadata_expire=300
sudo yum -q makecache -y --disablerepo='*' --enablerepo='tyk_tyk-pump'
sudo yum install -y tyk-pump
You need to replace <hostname> for --redishost=<hostname>, and <Mongo IP Address>, <Mongo Port> for --mongo=mongodb://<Mongo IP Address>:<Mongo Port>/ with your own values to run this script.
sudo /opt/tyk-pump/install/setup.sh --redishost=<hostname> --redisport=6379 --mongo=mongodb://<IP Address>:<Mongo Port>/tyk_analytics
You need to replace <hostname> for --redishost=<hostname>, and <Postgres Host Name>,<Port>, <User>, <Password>, <DB> for --postgres="host=<Postgres Host Name> port=<Port> user=<User> password=<Password> dbname=<DB>" with your own values to run this script.
sudo /opt/tyk-pump/install/setup.sh --redishost=<hostname> --redisport=6379 --postgres="host=<Postgres Host Name> port=<Port> user=<User> password=<Password> dbname=<DB>"
sudo service tyk-pump start
sudo journalctl -u tyk-pump
Using Ansible
Getting Started
- clone the tyk-ansible repositry
$ git clone https://github.com/TykTechnologies/tyk-ansible
cd into the directory
- Run initialisation script to initialise environment
-
Modify
hosts.yml file to update ssh variables to your server(s). You can learn more about the hosts file here
-
Run ansible-playbook to install
tyk-pump
$ ansible-playbook playbook.yaml -t tyk-pump
| Distribution | Version | Supported |
|---|
| Amazon Linux | 2 | ✅ |
| CentOS | 8 | ✅ |
| CentOS | 7 | ✅ |
| RHEL | 9 | ✅ |
| RHEL | 8 | ✅ |
| RHEL | 7 | ✅ |
Install Gateway
Using Shell
Tyk has it’s own signed RPMs in a YUM repository hosted by the kind folks at packagecloud.io, which makes it easy, safe and secure to install a trusted distribution of the Tyk Gateway stack.
This tutorial will run on an Amazon AWS Red Hat Enterprise Linux 7.1 instance. We will install Tyk Gateway with all dependencies stored locally.
We’re installing on a t2.micro because this is a tutorial, you’ll need more RAM and more cores for better performance.
This configuration should also work (with some tweaks) for CentOS.
Prerequisites
- Ensure port
8080 is open: this is used in this guide for Gateway traffic (API traffic to be proxied)
- EPEL (Extra Packages for Enterprise Linux) is a free, community based repository project from Fedora which provides high quality add-on software packages for Linux distribution including RHEL, CentOS, and Scientific Linux. EPEL isn’t a part of RHEL/CentOS but it is designed for major Linux distributions. In our case we need it for Redis. Install EPEL using the instructions here.
Step 1: Set up YUM Repositories
First, we need to install some software that allows us to use signed packages:
sudo yum install pygpgme yum-utils wget
/etc/yum.repos.d/tyk_tyk-gateway.repo that contains the repository configuration below https://packagecloud.io/tyk/tyk-gateway/install#manual-rpm:
[tyk_tyk-gateway]
name=tyk_tyk-gateway
baseurl=https://packagecloud.io/tyk/tyk-gateway/el/7/$basearch
repo_gpgcheck=1
gpgcheck=1
enabled=1
gpgkey=https://keyserver.tyk.io/tyk.io.rpm.signing.key.2020
       https://packagecloud.io/tyk/tyk-gateway/gpgkey
sslverify=1
sslcacert=/etc/pki/tls/certs/ca-bundle.crt
metadata_expire=300
sudo yum install -y redis tyk-gateway
Using Ansible
Requirements
Ansible - required for running the commands below. Use the Shell tab for instructions to install Tyk from a shell.
Getting Started
- clone the tyk-ansible repositry
$ git clone https://github.com/TykTechnologies/tyk-ansible
cd into the directory
- Run initialisation script to initialise environment
-
Modify
hosts.yml file to update ssh variables to your server(s). You can learn more about the hosts file here
-
Run ansible-playbook to install
tyk-gateway
$ ansible-playbook playbook.yaml -t `tyk-gateway-pro` or `tyk-gateway-hybrid`
| Distribution | Version | Supported |
|---|
| Amazon Linux | 2 | ✅ |
| CentOS | 8 | ✅ |
| CentOS | 7 | ✅ |
| RHEL | 9 | ✅ |
| RHEL | 8 | ✅ |
| RHEL | 7 | ✅ |
| Variable | Default | Comments |
|---|
| secrets.APISecret | 352d20ee67be67f6340b4c0605b044b7 | API secret |
| secrets.AdminSecret | 12345 | Admin secret |
| gateway.service.host | | Gateway server host if different than the hosts url |
| gateway.service.port | 8080 | Gateway server listening port |
| gateway.service.proto | http | Gateway server protocol |
| gateway.service.tls | false | Set to true to enable SSL connections |
| gateway.sharding.enabled | false | Set to true to enable filtering (sharding) of APIs |
| gateway.sharding.tags | | The tags to use when filtering (sharding) Tyk Gateway nodes. Tags are processed as OR operations. If you include a non-filter tag (e.g. an identifier such as node-id-1, this will become available to your Dashboard analytics) |
| gateway.rpc.connString | | Use this setting to add the URL for your MDCB or load balancer host |
| gateway.rpc.useSSL | true | Set this option to true to use an SSL RPC connection |
| gateway.rpc.sslInsecureSkipVerify | true | Set this option to true to allow the certificate validation (certificate chain and hostname) to be skipped. This can be useful if you use a self-signed certificate |
| gateway.rpc.rpcKey | | Your organization ID to connect to the MDCB installation |
| gateway.rpc.apiKey | | This the API key of a user used to authenticate and authorize the Gateway’s access through MDCB. The user should be a standard Dashboard user with minimal privileges so as to reduce any risk if the user is compromised. The suggested security settings are read for Real-time notifications and the remaining options set to deny |
| gateway.rpc.groupId | | This is the zone that this instance inhabits, e.g. the cluster/data-center the Gateway lives in. The group ID must be the same across all the Gateways of a data-center/cluster which are also sharing the same Redis instance. This ID should also be unique per cluster (otherwise another Gateway cluster can pick up your keyspace events and your cluster will get zero updates). |
Configure Tyk Gateway with the Dashboard
Prerequisites
This configuration assumes that you have already installed Tyk Dashboard, and have decided on the domain names for your Dashboard and your Portal. They must be different. For testing purposes, it is easiest to add hosts entries to your (and your servers) /etc/hosts file.
Set up Tyk Gateway with Quick Start Script
You can set up the core settings for Tyk Gateway with a single setup script, however for more involved deployments, you will want to provide your own configuration file.
You need to replace <hostname> for --redishost=<hostname>with your own value to run this script.
sudo /opt/tyk-gateway/install/setup.sh --dashboard=1 --listenport=8080 --redishost=<hostname> --redisport=6379
--dashboard=1: We want to use the Dashboard, since Tyk Gateway gets all it’s API Definitions from the Dashboard service, as of v2.3 Tyk will auto-detect the location of the dashboard, we only need to specify that we should use this mode.--listenport=8080: Tyk should listen on port 8080 for API traffic.--redishost=<hostname>: Use Redis on the hostname: localhost.--redisport=6379: Use the default Redis port.
Starting Tyk
The Tyk Gateway can be started now that it is configured. Use this command to start the Tyk Gateway:
sudo service tyk-gateway start
- Set Tyk to listen only on a specific domain for all API traffic.
- Set an API to listen on a specific domain (e.g. api1.com, api2.com).
- Split APIs over a domain using a path (e.g. api.com/api1, api.com/api2, moreapis.com/api1, moreapis.com/api2 etc).
- If you have set a hostname for the Gateway, then all non-domain-bound APIs will be on this hostname + the
listen_path.
Install Tyk on Debian or Ubuntu
Install Database
Using Shell
Requirements
Before installing the Tyk components in the order below, you need to first install Redis and MongoDB/SQL.
Getting Started
Install MongoDB 4.0You should follow the online tutorial for installing MongoDb. We will be using version 4.0. As part of the Mongo installation you need to perform the following:
- Import the public key
- Create a list file
- Reload the package database
- Install the MongoDB packages
- Start MongoDB
- Check the
mongod service is running
Install SQLYou should follow the online tutorial for installing PostgreSQL. We will be using version 13. As part of the PostgreSQL installation you need to perform the following:
- Create the file repository configuration
- Import the repository signing key
- Update the package lists
- Install the PostgreSQL packages
- Start PostgreSQL
- Check the
postgresql service is running
See SQL configuration for details on installing SQL in a production environment. $ sudo apt-get install -y redis-server
-
Dashboard
-
Pump
-
Gateway
For a production environment, we recommend that the Gateway, Dashboard and Pump are installed on separate machines. If installing multiple Gateways, you should install each on a separate machine. See Planning for Production For more details.
Using Ansible
Requirements
Ansible - required for running the commands below. Use the Shell tab for instructions to install Tyk from a shell.
Getting Started
- clone the tyk-ansible repositry
$ git clone https://github.com/TykTechnologies/tyk-ansible
cd into the directory
- Run initialisation script to initialise environment
-
Modify
hosts.yml file to update ssh variables to your server(s). You can learn more about the hosts file here
-
Run ansible-playbook to install the following:
- Redis
- MongoDB or PostgreSQL
- Tyk Dashboard
- Tyk Gateway
- Tyk Pump
$ ansible-playbook playbook.yaml -t tyk-pro -t redis -t `mongodb` or `pgsql`
-t redis or -t mongodb or -t pgsql However Redis and MongoDB or PostgreSQL are a requirement and need to be installed for the Tyk Pro installation to run.
Supported Distributions
| Distribution | Version | Supported |
|---|
| Debian | 10 | ✅ |
| Debian | 9 | ✅ |
| Ubuntu | 21 | ✅ |
| Ubuntu | 20 | ✅ |
| Ubuntu | 18 | ✅ |
| Ubuntu | 16 | ✅ |
| Variable | Default | Comments |
|---|
| secrets.APISecret | 352d20ee67be67f6340b4c0605b044b7 | API secret |
| secrets.AdminSecret | 12345 | Admin secret |
| redis.host | | Redis server host if different than the hosts url |
| redis.port | 6379 | Redis server listening port |
| redis.pass | | Redis server password |
| redis.enableCluster | false | Enable if redis is running in cluster mode |
| redis.storage.database | 0 | Redis server database |
| redis.tls | false | Enable if redis connection is secured with SSL |
| mongo.host | | MongoDB server host if different than the hosts url |
| mongo.port | 27017 | MongoDB server listening port |
| mongo.tls | false | Enable if mongo connection is secured with SSL |
| pgsql.host | | PGSQL server host if different than the hosts url |
| pgsql.port | 5432 | PGSQL server listening port |
| pgsql.tls | false | Enable if pgsql connection is secured with SSL |
| dash.license | | Dashboard license |
| dash.service.host | | Dashboard server host if different than the hosts url |
| dash.service.port | 3000 | Dashboard server listening port |
| dash.service.proto | http | Dashboard server protocol |
| dash.service.tls | false | Set to true to enable SSL connections |
| gateway.service.host | | Gateway server host if different than the hosts url |
| gateway.service.port | 8080 | Gateway server listening port |
| gateway.service.proto | http | Gateway server protocol |
| gateway.service.tls | false | Set to true to enable SSL connections |
| gateway.sharding.enabled | false | Set to true to enable filtering (sharding) of APIs |
| gateway.sharding.tags | | The tags to use when filtering (sharding) Tyk Gateway nodes. Tags are processed as OR operations. If you include a non-filter tag (e.g. an identifier such as node-id-1, this will become available to your Dashboard analytics) |
| gateway.rpc.connString | | Use this setting to add the URL for your MDCB or load balancer host |
| gateway.rpc.useSSL | true | Set this option to true to use an SSL RPC connection |
| gateway.rpc.sslInsecureSkipVerify | true | Set this option to true to allow the certificate validation (certificate chain and hostname) to be skipped. This can be useful if you use a self-signed certificate |
| gateway.rpc.rpcKey | | Your organization ID to connect to the MDCB installation |
| gateway.rpc.apiKey | | This the API key of a user used to authenticate and authorize the Gateway’s access through MDCB. The user should be a standard Dashboard user with minimal privileges so as to reduce any risk if the user is compromised. The suggested security settings are read for Real-time notifications and the remaining options set to deny |
| gateway.rpc.groupId | | This is the zone that this instance inhabits, e.g. the cluster/data-center the Gateway lives in. The group ID must be the same across all the Gateways of a data-center/cluster which are also sharing the same Redis instance. This ID should also be unique per cluster (otherwise another Gateway cluster can pick up your keyspace events and your cluster will get zero updates). |
| Variable | Default | Comments |
|---|
| redis_bind_interface | 0.0.0.0 | Binding address of Redis |
| Variable | Default | Comments |
|---|
| bind_ip | 0.0.0.0 | Binding address of MongoDB |
| mongodb_version | 4.4 | MongoDB version |
| Variable | Default | Comments |
|---|
| postgresql_databases[] | [] | Array of DBs to be created |
| postgresql_databases[].name | tyk_analytics | Database name |
| postgresql_users[] | [] | Array of users to be created |
postgresql_users[0].name | default | User name |
postgresql_users[0].password | topsecretpassword | User password |
| postgresql_global_config_options[] | [] | Postgres service config options |
postgresql_global_config_options[1].option | listen_addresses | Listen address binding for the service |
postgresql_global_config_options[1].value | * | Default value to listen to all addresses |
| postgresql_hba_entries[] | [] | Host based authenticaiton list |
postgresql_hba_entries[4].type | host | Entry type |
postgresql_hba_entries[4].database | tyk_analytics | Which database this entry will give access to |
postgresql_hba_entries[4].user | default | What users this gain access from this entry |
postgresql_hba_entries[4].address | 0.0.0.0/0 | What addresses this gain access from this entry |
postgresql_hba_entries[4].auth_method | md5 | What authentication method to to use for the users |
Install Dashboard
Using Shell
Tyk has its own APT repositories hosted by the kind folks at packagecloud.io, which makes it easy, safe and secure to install a trusted distribution of the Tyk Gateway stack.
This tutorial has been tested on Ubuntu 16.04 & 18.04 with few if any modifications. We will install the Tyk Dashboard with all dependencies locally.
Prerequisites
- Have MongoDB/SQL and Redis installed - follow the guide for installing databases on Debian/Ubuntu.
- Ensure port
3000 is available. This is used by the Tyk Dashboard to provide the GUI and the Developer Portal.
Step 1: Set up our APT Repositories
First, add our GPG key which signs our binaries:
curl -L https://packagecloud.io/tyk/tyk-dashboard/gpgkey | sudo apt-key add -
sudo apt-get install -y apt-transport-https
-a flag in the second Tyk commands - this is important!):
echo "deb https://packagecloud.io/tyk/tyk-dashboard/ubuntu/ bionic main" | sudo tee /etc/apt/sources.list.d/tyk_tyk-dashboard.list

echo "deb-src https://packagecloud.io/tyk/tyk-dashboard/ubuntu/ bionic main" | sudo tee -a /etc/apt/sources.list.d/tyk_tyk-dashboard.list

sudo apt-get update
bionic is the code name for Ubuntu 18.04. Please substitute it with your particular ubuntu release, e.g. focal.
- Added the Tyk Dashboard repository
- Updated our package list
Step 2: Install the Tyk Dashboard
We’re now ready to install the Tyk Dashboard. To install run:
sudo apt-get install -y tyk-dashboard
apt-get to install the Tyk Dashboard without prompting. Wait for the downloads to complete.
When the Tyk Dashboard has finished installing, it will have installed some init scripts, but it will not be running yet. The next step will be to setup each application - thankfully this can be done with three very simple commands.
Verify the origin key (optional)
Debian packages are signed with the repository keys. These keys are verified at the time of fetching the package and is taken care of by the apt infrastructure. These keys are controlled by PackageCloud, our repository provider. For an additional guarantee, it is possible to verify that the package was indeed created by Tyk by verifying the origin certificate that is attached to the package.
First, you have to fetch Tyk’s signing key and import it.
wget https://keyserver.tyk.io/tyk.io.deb.signing.key
gpg --import tyk.io.deb.signing.key
- sign the key with your ultimately trusted key
- trust this key ultimately
The downloaded package will be available in /var/cache/apt/archives. Assuming you found the file tyk-gateway-2.9.4_amd64.deb there, you can verify the origin signature.
gpg --verify d.deb
gpg: Signature made Wed 04 Mar 2020 03:05:00 IST
gpg:                using RSA key F3781522A858A2C43D3BC997CA041CD1466FA2F8
gpg: Good signature from "Team Tyk (package signing) <team@tyk.io>" [ultimate]
Configure Tyk Dashboard
Prerequisites for MongoDB
You need to ensure the MongoDB and Redis services are running before proceeding.
You need to replace <hostname> for --redishost=<hostname>, and <IP Address> for --mongo=mongodb://<IP Address>/ with your own values to run this script.
sudo /opt/tyk-dashboard/install/setup.sh --listenport=3000 --redishost=<hostname> --redisport=6379 --mongo=mongodb://<IP Address>/tyk_analytics --tyk_api_hostname=$HOSTNAME --tyk_node_hostname=http://localhost --tyk_node_port=8080 --portal_root=/portal --domain="XXX.XXX.XXX.XXX"
Make sure to use the actual DNS hostname or the public IP of your instance as the last parameter.
--listenport=3000: Told the Tyk Dashboard (and Portal) to listen on port 3000.--redishost=<hostname>: The Tyk Dashboard should use the local Redis instance.--redisport=6379: The Tyk Dashboard should use the default port.--domain="XXX.XXX.XXX.XXX": Bind the Tyk Dashboard to the IP or DNS hostname of this instance (required).--mongo=mongodb://<IP Address>/tyk_analytics: Use the local MongoDB (should always be the same as the gateway).--tyk_api_hostname=$HOSTNAME: The Tyk Dashboard has no idea what hostname has been given to Tyk, so we need to tell it, in this instance we are just using the local HOSTNAME env variable, but you could set this to the public-hostname/IP of the instance.--tyk_node_hostname=http://localhost: The Tyk Dashboard needs to see a Tyk node in order to create new tokens, so we need to tell it where we can find one, in this case, use the one installed locally.--tyk_node_port=8080: Tell the Tyk Dashboard that the Tyk node it should communicate with is on port 8080.--portal_root=/portal: We want the portal to be shown on /portal of whichever domain we set for the portal.
Prerequisites for SQL
You need to ensure the PostgreSQL and Redis services are running before proceeding.
You need to replace <hostname> for --redishost=<hostname>, and <Postgres Host Name>, <Port>, <User>, <Password>, <DB> for --connection_string="host=<Postgres Host Name> port=<Port> user=<User> password=<Password> dbname=<DB>" with your own values to run this script.
sudo /opt/tyk-dashboard/install/setup.sh --listenport=3000 --redishost=<hostname> --redisport=6379 --storage=postgres --connection_string="host=<Postgres Host Name> port=<Port> user=<User> password=<Password> dbname=<DB>" --tyk_api_hostname=$HOSTNAME --tyk_node_hostname=http://localhost --tyk_node_port=8080 --portal_root=/portal --domain="XXX.XXX.XXX.XXX"
Make sure to use the actual DNS hostname or the public IP of your instance as the last parameter.
--listenport=3000: Told the Tyk Dashboard (and Portal) to listen on port 3000.--redishost=<hostname>: The Tyk Dashboard should use the local Redis instance.--redisport=6379: The Tyk Dashboard should use the default port.--domain="XXX.XXX.XXX.XXX": Bind the dashboard to the IP or DNS hostname of this instance (required).--storage=postgres: Use storage type postgres.--connection_string="host=<Postgres Host Name> port=<Port> user=<User> password=<Password> dbname=<DB>": Use the postgres instance provided in the connection string(should always be the same as the gateway).--tyk_api_hostname=$HOSTNAME: The Tyk Dashboard has no idea what hostname has been given to Tyk, so we need to tell it, in this instance we are just using the local HOSTNAME env variable, but you could set this to the public-hostname/IP of the instance.--tyk_node_hostname=http://localhost: The Tyk Dashboard needs to see a Tyk node in order to create new tokens, so we need to tell it where we can find one, in this case, use the one installed locally.--tyk_node_port=8080: Tell the dashboard that the Tyk node it should communicate with is on port 8080.--portal_root=/portal: We want the portal to be shown on /portal of whichever domain we set for the portal.
Step 1: Enter your Tyk Dashboard License
Add your license in /opt/tyk-dashboard/tyk_analytics.conf in the license field.
Step 2: Start the Tyk Dashboard
Start the dashboard service, and ensure it will start automatically on system boot.
sudo systemctl start tyk-dashboard
sudo systemctl enable tyk-dashboard
-
Your Organization Name
-
Your Organization Slug
-
Your User Email Address
-
Your User First and Last Name
-
A Password for your User
-
Re-enter your user Password
For a password, we recommend a combination of alphanumeric characters, with both upper and lower case
letters.
Click Bootstrap to save the details.
Step 6 - Login to the Tyk Dashboard
You can now log in to the Tyk Dashboard from 127.0.0.1:3000, using the username and password created in the Dashboard Setup screen.
Configure your Developer Portal
To set up your Developer Portal follow our Self-Managed tutorial on publishing an API to the Portal Catalog.
Using Ansible
Getting Started
- clone the tyk-ansible repositry
$ git clone https://github.com/TykTechnologies/tyk-ansible
cd into the directory
- Run initialisation script to initialise environment
-
Modify
hosts.yml file to update ssh variables to your server(s). You can learn more about the hosts file here
-
Run ansible-playbook to install
tyk-dashboard
$ ansible-playbook playbook.yaml -t tyk-dashboard
| Distribution | Version | Supported |
|---|
| Debian | 10 | ✅ |
| Debian | 9 | ✅ |
| Ubuntu | 21 | ✅ |
| Ubuntu | 20 | ✅ |
| Ubuntu | 18 | ✅ |
| Ubuntu | 16 | ✅ |
| Variable | Default | Comments |
|---|
| secrets.APISecret | 352d20ee67be67f6340b4c0605b044b7 | API secret |
| secrets.AdminSecret | 12345 | Admin secret |
| dash.license | | Dashboard license |
| dash.service.host | | Dashboard server host if different than the hosts url |
| dash.service.port | 3000 | Dashboard server listening port |
| dash.service.proto | http | Dashboard server protocol |
| dash.service.tls | false | Set to true to enable SSL connections |
Install Pump
Using Shell
This tutorial has been tested Ubuntu 16.04 & 18.04 with few if any modifications.
Prerequisites
- You have installed Redis and either MongoDB or SQL.
- You have installed the Tyk Dashboard.
Step 1: Set up our APT repositories
First, add our GPG key which signs our binaries:
curl -L https://packagecloud.io/tyk/tyk-pump/gpgkey | sudo apt-key add -
sudo apt-get install -y apt-transport-https
-a flag in the second Tyk commands - this is important!):
echo "deb https://packagecloud.io/tyk/tyk-pump/ubuntu/ bionic main" | sudo tee /etc/apt/sources.list.d/tyk_tyk-pump.list

echo "deb-src https://packagecloud.io/tyk/tyk-pump/ubuntu/ bionic main" | sudo tee -a /etc/apt/sources.list.d/tyk_tyk-pump.list

sudo apt-get update
bionic is the code name for Ubuntu 18.04. Please substitute it with your particular ubuntu release, e.g. focal.
- Added the Tyk Pump repository
- Updated our package list
Step 2: Install the Tyk Pump
You’re now ready to install the Tyk Pump. To install it, run:
sudo apt-get install -y tyk-pump
apt-get to install Tyk Pump without prompting. Wait for the downloads to complete.
When Tyk Pump has finished installing, it will have installed some init scripts, but it will not be running yet. The next step will be to setup each application using three very simple commands.
Verify the origin key (optional)
Debian packages are signed with the repository keys. These keys are verified at the time of fetching the package and is taken care of by the apt infrastructure. These keys are controlled by PackageCloud, our repository provider. For an additional guarantee, it is possible to verify that the package was indeed created by Tyk by verifying the origin certificate that is attached to the package.
First, you have to fetch Tyk’s signing key and import it.
wget https://keyserver.tyk.io/tyk.io.deb.signing.key
gpg --import tyk.io.deb.signing.key
- sign the key with your ultimately trusted key
- trust this key ultimately
The downloaded package will be available in /var/cache/apt/archives. Assuming you found the file tyk-gateway-2.9.3_amd64.deb there, you can verify the origin signature.
gpg --verify d.deb
gpg: Signature made Wed 04 Mar 2020 03:05:00 IST
gpg:                using RSA key F3781522A858A2C43D3BC997CA041CD1466FA2F8
gpg: Good signature from "Team Tyk (package signing) <team@tyk.io>" [ultimate]
You need to replace <hostname> for --redishost=<hostname>, and <IP Address> for --mongo=mongodb://<IP Address>/ with your own values to run this script.
sudo /opt/tyk-pump/install/setup.sh --redishost=<hostname> --redisport=6379 --mongo=mongodb://<IP Address>/tyk_analytics
You need to replace <hostname> for --redishost=<hostname>, and <Postgres Host Name>,<Port>, <User>, <Password>, <DB> for --postgres="host=<Postgres Host Name> port=<Port> user=<User> password=<Password> dbname=<DB>" with your own values to run this script.
sudo /opt/tyk-pump/install/setup.sh --redishost=<hostname> --redisport=6379 --postgres="host=<Postgres Host Name> port=<Port> user=<User> password=<Password> dbname=<DB>"
sudo service tyk-pump start
sudo service tyk-pump enable
sudo tail -f /var/log/upstart/tyk-pump.log
Using Ansible
Install Tyk Pump Through Ansible
Getting Started
- clone the tyk-ansible repositry
$ git clone https://github.com/TykTechnologies/tyk-ansible
cd into the directory
- Run initialisation script to initialise environment
-
Modify
hosts.yml file to update ssh variables to your server(s). You can learn more about the hosts file here
-
Run ansible-playbook to install
tyk-pump
$ ansible-playbook playbook.yaml -t tyk-pump
| Distribution | Version | Supported |
|---|
| Debian | 10 | ✅ |
| Debian | 9 | ✅ |
| Ubuntu | 21 | ✅ |
| Ubuntu | 20 | ✅ |
| Ubuntu | 18 | ✅ |
| Ubuntu | 16 | ✅ |
Install Gateway
Using Shell
Tyk has it’s own APT repositories hosted by the kind folks at packagecloud.io, which makes it easy, safe and secure to install a trusted distribution of the Tyk Gateway stack.
This tutorial has been tested on Ubuntu 16.04 & 18.04 with few if any modifications.
Please note however, that should you wish to write your own plugins in Python, we currently have a Python version dependency of 3.4. Python-3.4 ships with Ubuntu 14.04, however you may need to explicitly install it on newer Ubuntu Operating System releases.
Prerequisites
- Ensure port
8080 is available. This is used in this guide for Gateway traffic (API traffic to be proxied).
- You have MongoDB and Redis installed.
- You have installed firstly the Tyk Dashboard, then the Tyk Pump.
Step 1: Set up our APT Repositories
First, add our GPG key which signs our binaries:
curl -L https://packagecloud.io/tyk/tyk-gateway/gpgkey | sudo apt-key add -
sudo apt-get install -y apt-transport-https
/etc/apt/sources.list.d/tyk_tyk-gateway.list with the following contents:
deb https://packagecloud.io/tyk/tyk-gateway/ubuntu/ bionic main
deb-src https://packagecloud.io/tyk/tyk-gateway/ubuntu/ bionic main
bionic is the code name for Ubuntu 18.04. Please substitute it with your particular ubuntu release, e.g. focal.
- Added the Tyk Gateway repository
- Updated our package list
Step 2: Install the Tyk Gateway
We’re now ready to install the Tyk Gateway. To install it, run:
sudo apt-get install -y tyk-gateway
apt infrastructure. These keys are controlled by PackageCloud, our repository provider. For an additional guarantee, it is possible to verify that the package was indeed created by Tyk by verifying the origin certificate that is attached to the package.
First, you have to fetch Tyk’s signing key and import it.
wget https://keyserver.tyk.io/tyk.io.deb.signing.key
gpg --import tyk.io.deb.signing.key
- sign the key with your ultimately trusted key
- trust this key ultimately
The downloaded package will be available in /var/cache/apt/archives. Assuming you found the file tyk-gateway-2.9.4_amd64.deb there, you can verify the origin signature.
gpg --verify d.deb
gpg: Signature made Wed 04 Mar 2020 03:05:00 IST
gpg:                using RSA key F3781522A858A2C43D3BC997CA041CD1466FA2F8
gpg: Good signature from "Team Tyk (package signing) <team@tyk.io>" [ultimate]
/etc/hosts file.
Set up Tyk
You can set up the core settings for Tyk Gateway with a single setup script, however for more involved deployments, you will want to provide your own configuration file.
You need to replace <hostname> for --redishost=<hostname>with your own value to run this script.
sudo /opt/tyk-gateway/install/setup.sh --dashboard=1 --listenport=8080 --redishost=<hostname> --redisport=6379
--dashboard=1: We want to use the Dashboard, since Tyk Gateway gets all it’s API Definitions from the Dashboard service, as of v2.3 Tyk will auto-detect the location of the dashboard, we only need to specify that we should use this mode.--listenport=8080: Tyk should listen on port 8080 for API traffic.--redishost=<hostname>: Use Redis on your hostname.--redisport=6379: Use the default Redis port.
Starting Tyk
The Tyk Gateway can be started now that it is configured. Use this command to start the Tyk Gateway:
sudo service tyk-gateway start
sudo service tyk-gateway enable
- Set Tyk to listen only on a specific domain for all API traffic.
- Set an API to listen on a specific domain (e.g. api1.com, api2.com).
- Split APIs over a domain using a path (e.g. api.com/api1, api.com/api2, moreapis.com/api1, moreapis.com/api2 etc).
- If you have set a hostname for the Gateway, then all non-domain-bound APIs will be on this hostname + the
listen_path.
Using Ansible
Getting Started
- clone the tyk-ansible repositry
$ git clone https://github.com/TykTechnologies/tyk-ansible
cd into the directory
- Run initialisation script to initialise environment
-
Modify
hosts.yml file to update ssh variables to your server(s). You can learn more about the hosts file here
-
Run ansible-playbook to install
tyk-gateway
$ ansible-playbook playbook.yaml -t `tyk-gateway-pro` or `tyk-gateway-hybrid`
| Distribution | Version | Supported |
|---|
| Debian | 10 | ✅ |
| Debian | 9 | ✅ |
| Ubuntu | 21 | ✅ |
| Ubuntu | 20 | ✅ |
| Ubuntu | 18 | ✅ |
| Ubuntu | 16 | ✅ |
| Variable | Default | Comments |
|---|
| secrets.APISecret | 352d20ee67be67f6340b4c0605b044b7 | API secret |
| secrets.AdminSecret | 12345 | Admin secret |
| gateway.service.host | | Gateway server host if different than the hosts url |
| gateway.service.port | 8080 | Gateway server listening port |
| gateway.service.proto | http | Gateway server protocol |
| gateway.service.tls | false | Set to true to enable SSL connections |
| gateway.sharding.enabled | false | Set to true to enable filtering (sharding) of APIs |
| gateway.sharding.tags | | The tags to use when filtering (sharding) Tyk Gateway nodes. Tags are processed as OR operations. If you include a non-filter tag (e.g. an identifier such as node-id-1, this will become available to your Dashboard analytics) |
| gateway.rpc.connString | | Use this setting to add the URL for your MDCB or load balancer host |
| gateway.rpc.useSSL | true | Set this option to true to use an SSL RPC connection |
| gateway.rpc.sslInsecureSkipVerify | true | Set this option to true to allow the certificate validation (certificate chain and hostname) to be skipped. This can be useful if you use a self-signed certificate |
| gateway.rpc.rpcKey | | Your organization ID to connect to the MDCB installation |
| gateway.rpc.apiKey | | This the API key of a user used to authenticate and authorize the Gateway’s access through MDCB. The user should be a standard Dashboard user with minimal privileges so as to reduce any risk if the user is compromised. The suggested security settings are read for Real-time notifications and the remaining options set to deny |
| gateway.rpc.groupId | | This is the zone that this instance inhabits, e.g. the cluster/data-center the Gateway lives in. The group ID must be the same across all the Gateways of a data-center/cluster which are also sharing the same Redis instance. This ID should also be unique per cluster (otherwise another Gateway cluster can pick up your keyspace events and your cluster will get zero updates). |
Init Systems
Tyk packages support SysVinit Linux init systems, systemd and Upstart (both 0.6.x and 1.x, [FYI - Ubuntu stopped supporting Upstart] upstart(https://askubuntu.com/questions/1024120/will-ubuntu-18-04-lts-still-support-upstart-or-do-we-have-to-change-to-systemd)).
During package installation only one is chosen depending on the operating system support, e.g.:
- CentOS 6, RHEL 6, Amazon Linux ship with Upstart 0.6.x
- Ubuntu 14.04, Debian Jessie with Upstart 1.x
- CentOS 7, RHEL 7, Ubuntu 16.04, Debian Stretch are running with systemd
- Certain older distros may only provide SysVinit but all of them typically provide compatibility with its scripts
Note that any init scripts of your choosing can be used instead of automatically detected ones by copying them from the install/inits directory inside the package directory.
This init system variance implies there are different ways to manage the services and collect service logs.
Upstart
For Upstart, service management can be performed through the initctl or a set of start, stop, restart and status commands. Upstart 1.x also works with the service command.
systemd
For systemd, either systemctl or service commands may be utilized.
The service command can usually be used with SysVinit scripts, as well as invoking them directly.
- Upstart 0.6.x and SysVinit: log files are located in
/var/logs for every respective service, e.g. /var/logs/tyk-gateway.stderr and /var/logs/tyk-gateway.stdout
- Upstart 1.x: by default everything is stored in
/var/logs/upstart directory, e.g. /var/logs/upstart/tyk-gateway.log
- systemd utilizes its own logging mechanism called journald, which is usable via the
journalctl command, e.g. journalctl -u tyk-gateway
Please consult with respective init system documentation for more details on how to use and configure it.